As is the case with most of the Z3, the heater controls are ‘borrowed’ from the E36 series, but in their new home there is far less space behind them than in the original application. This, coupled with the tight fit of the bulbs in their mountings, makes replacement less than easy. While the side panels of the centre console can be flexed sufficiently to permit touching the bulbs, their removal is impossible, and even BMW avoid the provision of any information on their replacement. The procedure is, however, not too difficult.
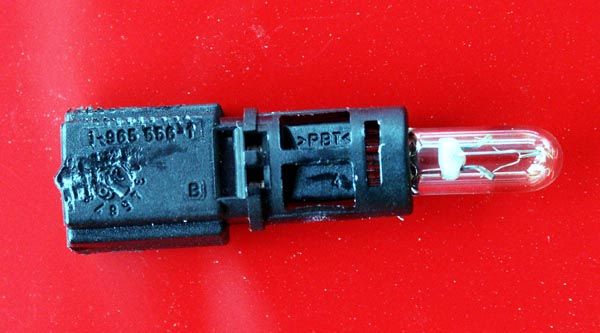
The heater bulbs are a special type
The first step is to extract the radio from the centre console, ideally leaving it connected to the power supply, in order to avoid the necessity of reprogramming the plethora of available options. Users of non-BMW radio units will find this easier, due to the additional length of the adaptor cable used to convert the connector provided by BMW to the standard DIN socket used by other manufacturers.
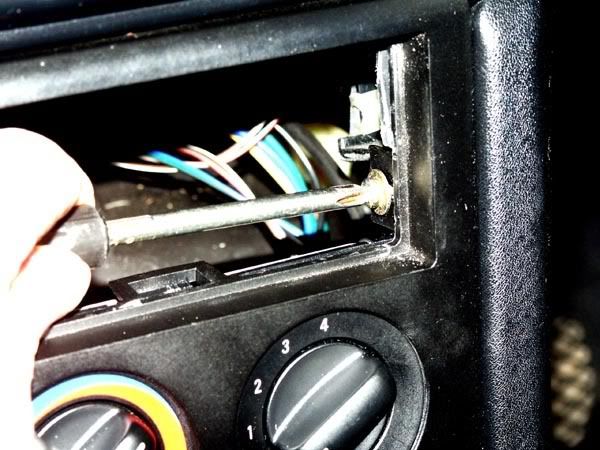
After removing the radio sleeve you will see the securing screws and the plastic ‘staple’ catches
Extraction of the metal radio mounting sleeve uncovers a screw at each lower corner of the aperture. With these removed, a pair of ‘staple’-shaped plastic latches on the lower edge can be slightly raised (using finger nails only) after which gentle thumb pressure on the heater control dials will move the upper edge of the control assembly inwards, leaving three holes in the console.
Continued movement will disengage a pair of pins on the lower edge of the heater controls from holes in the lower mating surface. The controls can now be pushed into the console and rotated to find the illumination bulbs. The base of the right-hand bulb is at the top of the assembly facing forwards, while that of the left-hand bulb faces downwards from the bottom.
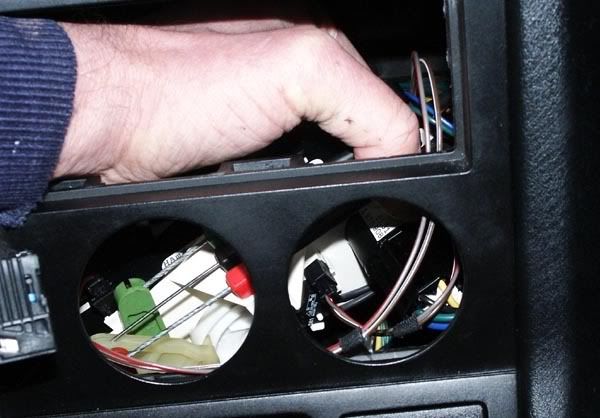
The RH bulb now be seen in RH aperture after inverting the heater controls
The electrical connectors can be easily withdrawn, but removal of the bulbs requires a really good pull, using long-nosed pliers. Fitting the new bulbs is, however, quite easy. Even if only one bulb has failed, replace both together as a preventative measure.
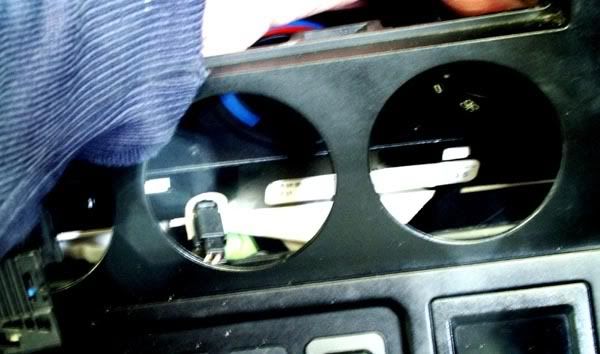
LH bulb can be seen in the centre aperture, facing upwards
There are no real problems in this task, but precautions should be taken against dropping either the screws or their associated spring clip ‘body nuts’ inside the console. A couple of spares would be a good precaution. The Bowden cables between the controls and the heater are very springy, making rotation of the control unit difficult, and promoting damage to the back of one’s hand, but thin rubber gloves offer good protection from the otherwise inevitable abrasions.
Although this is one of those tasks where anticipation is worse than reality, it is not something to be done more often than necessary. With this in mind the best policy is to avoid leaving the instrument lighting at maximum intensity, as even a small reduction will extend the life of the bulbs dramatically.
Mike Fishwick


You must be logged in to post a comment.